I'm hard on my machines. I do things like leave them number crunching at 100% cpu utilization for a week while I am out of the country. It should be no surprise that they tend to overheat, have power supplies or hard drives go out, et cetera.
This time around, I have decided to take my time and try to head that off. I've been collecting parts one at a time and I'm honestly a little nervous about my first foray into watercooling -- but water + SSD should help with my core failures.
Eventually I'll add things like triple monitors at 2560x1600 each -- but for now, it's a little light on the specs:
Before we go on, I realize you may be asking a few questions.
Q: Why are you installing Windows too?
A: Unfortunately, some games I like to play are not available for Linux
Q: Why do dual-sli on a quad-sli board?
A: I was planning on buying the watercooled GTX 590; but EVGA pulled them before I could. I'd rather try dual watercooled than quad air cooled.
Q: Why Mint instead of Ubuntu?
A: Because Unity pisses me off. If I wanted a Mac-like interface, I would have bought one.
Q: Why Windows 7 instead of Windows 8?
A: Because that tablet UI is disgusting. If I wanted a Mac-like interface, I would have bought one.
Q: Why buy 16GB ram when the board supports 32?
A: Because the QVL didn't list any 32GB option. I decided to go with something officially supported.
Q: Why is the Linksys not in the pre-build image?
A: Half way through the build I realized that everything in my house is wireless and nothing was wired. I ran to Fry's and picked it up.
Q: Why are the pictures so crappy?
A: Unfortunately, it appears I do not have very good lighting in my house. This was on the dining room table, with chandelier above, stand lamp next to, flash on, window curtains open and all neighboring room lights on. It also made it near impossible to work on it after 5ish.
Ok, onto the build...
Case: Thermaltake Level 10 GT LCS
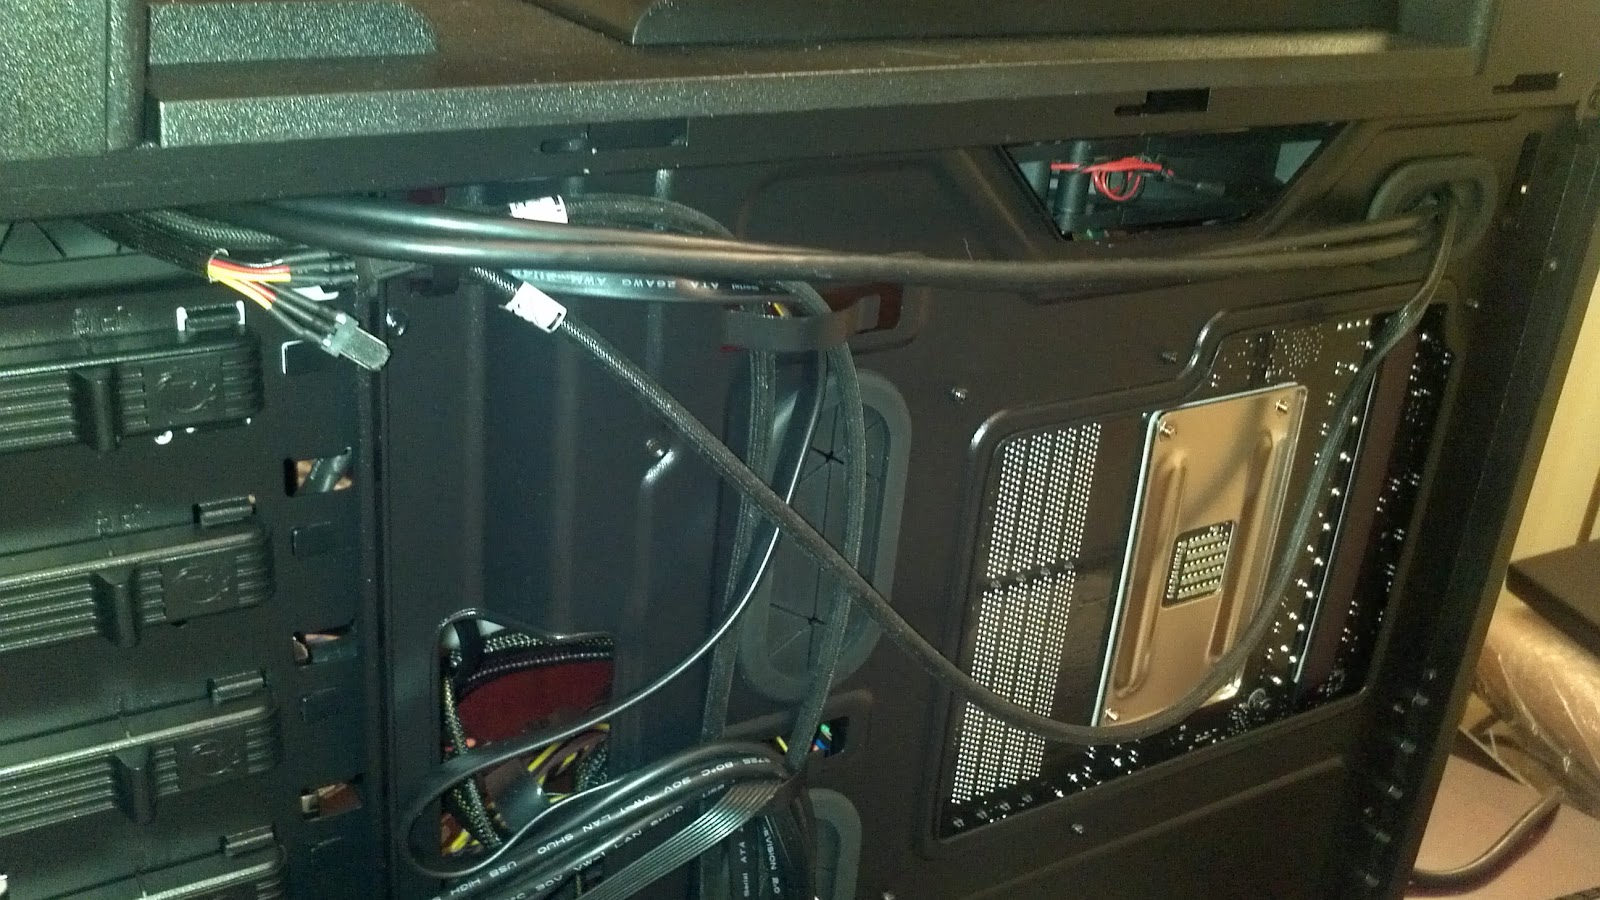
The case is really nice. It has these ports so that wiring can easily be ran behind the motherboard instead of over. Unfortunately for me, I rarely have cables long enough to justify it.
The case comes a few items -- mostly for the water cooling. The open case panel in the picture comes off easily, and in fact was off for the entire build. The back panel also comes off, though that is more of a traditional slide under-edge type (which is not easy to get back on when you are tired).
Motherboard: Asus 990FX Sabertooth
The motherboard is a very nice looking design. I like how the heat pipes look a bit aggressive.
CPU: AMD FX-8150P
The CPU came in a nice tin - but most of the space is for the fan which we aren't going to use for this build. According to the manual, you void your warranty if you don't use their included fan -- but I'm going the watercooling route, so...
Installing the CPU into the Motherboard
CPU installation was a breeze. For some reason it took me awhile to find the arrow on the motherboard, but as you can see in this picture, it is clearly marked. I'll blame the bad lighting ;)
Installing the back plate
Installing the back plate was a bit tricky. Three of the edges were easy to get to, but the forth one required some finger contortions. Popping it in generally caused the others to come out. I even tried using tape to hold the others in place while I finagled the last one in. Eventually I got it without the tape, but it probably took me a good 15 minutes to snap it into place.
CPU Waterblock
One of the reviews I read had warned to attach the hoses to the cpu waterblock before trying to put it on the CPU. That was great advise, because it took a LOT of pressure to get it on. To cut the correct length of tubing, I sat the waterblock in place and moved the tubing around until it looked like it would work without kinking. If I ever upgrade the watercooling, I think I might go for something that allows a smaller turn radius. You also need to screw the right braces onto the block. The case comes with 3 different sets. For AMD, they all use the same one, so it was easy enough to pick out. The black covers were a bit difficult to get off, but a small pair of needle nose pliers worked pretty well.
Adding the quick connect was trivial -- probably the easiest part of the entire water setup. I really hope these don't leak. Future upgrades might include me replacing all the connections with quick connects.
Memory: Corsair CML16GX3M4A1600C9
I was really please with this memory. While adding it to the system, those radiator fans felt very nice. Others had warned about the CPU fan getting in the way, but that was not a problem for our water block. I was expecting both ends to snap in place, but it appears that only one side moves.
Thermal paste
I've never had to install thermal paste before. There was always some sticker like thing provided to use instead. This time around I had to use the thermal paste. I have no clue why they provided it in a syringe type of container, because all it does is bulk up at the tip like gooey wet silly putty. I thought for a minute that maybe something was wrong with it, with the consistency. To be honest, I don't know. Since I am cooling with water, I'm hoping it is OK. It that is the consistency it is supposed to be, I think the industry should really reconsider the delivery mechanism. I tried spreading it over the entire CPU, but this was the best I was able to do. Maybe it spread out a little bit when the water block was clamped down. Here's hoping.
Install the water cooling block
Installing the block wasn't so bad. It was difficult to see whether the braces were on correctly before clamping down. Installing the quick connect was very nice.
In order to keep the tubing from hitting the fan on the side of the case, I put a twisty tie (it was holding the accessory box inside the case during shipping) to anchor it to the top of the case. The top (and bottom actually) of the case are netted, so putting something through is very easy.
Power Supply: Thermaltake TPG-1200M
I was actually impressed with the packaging of the power supply, In addition to a felt bag for the accessories and a felt (not plastic) bag for the power supply itself, it also came with a little velcro case for the modular cables. I was a little confused why a couple items were outside the bags, but overall it was a nice presentation.
Installing it was easy with the exception that the provided rubber gaskets didn't fit anywhere correctly. I ended up using them for the top holes - but IMHO the gaskets should have connected to all the screw holes.
I really like that the PSU sits in the bottom of the case; but I wish there was a little more clearance between it and the motherboard. It made it difficult to get some of the connects in since my hand was too hide for the space.
Windows Drive: Crucial M4 2.5" 512GB SATA III SSD
Linux Drive: Crucial M4 2.5" 512GB SATA III SSD
These "drives" are small, lightweight, no moving parts and SATA III. What's not to love. To mount them, first turn the key to Unlock, push the button while pulling the drawer out. Screen the drive to the drawer. Push it in.
Note in the last picture the band of power cabling. It goes to a power connector hanging loose under the bottom drive.
Video: 2x
EVGA GeForce GTX 580 FTW Hydro Copper 2 3072 MB
The video cards are pretty. And heavy. The box contains barbs and rings for two different tubes. It also comes with the power cables and a couple adapters.
To determine which position to put the barbs, I sat the card in the case where it is going to go and again manhandled the tubing until I found a non-crinking way to tube it. That led me to putting the one closest to the CPU further away from the water source so there was more room for the water loop. For the second one, I decided it would be easier to do a straight tube between them than to try to curve it.
| First Card | Second Card |
|---|

| 
|
One odd thing was that the second card had an extra rubber washer on it. At first I took the cards apart again trying to figure out which one was messed up. When I realized that one had an extra rubber on it, it took me a minute to decide whether to remove it or not. In the end, I decided that it might be less likely to leak with it (I hope) so I kept it on. Assuming it doesn't cause a problem, I kinda wish I had the extra on all the other barbs.
When installing the first card, it went in without a hitch. The second card was a bit more cramped as the sata connectors sit under it. Well, that and I had forgotten to take the plate off:
Taking that off (10 minutes later) helped get the second card in without much additional hassle.
WiFi: Linksys WMP600N Wireless Dual-Band a/b/g/n
Earlier in the day, I remembered that everything in the house was wireless. I also remembered that the printer worked only with the wireless computers when in wireless mode and only with the wired computers when it wired mode. Why? I don't know - never took the time to figure it out. Probably a problem with the routing on the $34 wifi router (which I also decided I am going to replace). Long story short, I decided I wanted wifi. I didn't want a USB adapter because my cat likes to climb on things, so I opted for a PCI card. I was going to buy the PCIe card at Fry's instead, but then I saw the dual-band and decided that might be a better choice.
So, there aren't many standard PCI slots anymore. Mine happened to be pretty close to touching the 2nd GTX 580. At first I was nervous about them being that close, then I thought 'hey, maybe it will get some minor cooling from the nearby waterblock'. Besides the component was on the other side.
Time to finish off the tubing
I adding the SLI connector and the small tube between the cards.
Connected the first card to the loop
And connected the second card back to the reservoir.
Connect motherboard to PSU
And power connectors to the video cards
The Diabolical USB 3.0 Header
I had actually connected some more cabling and was almost done when I tried to plug in the USB 3.0 header for the top of the case. I probably should have seen the problem right away and shaved it -- but before I realized what was going on, one of the pins in the header was bent over. Unfortunately, it was the one in the corner away from the graphics card, so I was having a lot of trouble getting a good angle. I told myself I should take everything apart, but I tried one too many times and broke the pin off. Looks like the 2 USB 3.0 jacks on the top of the case will go un-utilized.
... insert time taken to plug in all the cabling ...
Most of the cabling was easy enough to connect. As stated, the USB 3.0 header wasn't. The connections near the PSU were a little difficult. The power connector for the SATA bays hiding underneath the bottom tray took a moment to find...
But the LED/Fan control didn't work. A couple fans were spinning, water was moving, but the door fan (when closed) did not spin and none of the LEDs came on, and the LED Fan Controller had no power. I get the impression I am missing a molex connector somewhere, but as of yet have not found it. One thing that I thought was kind of odd is that on the back of the case, there are 3 headers but only two cables... What's that about?
There was another molex connector hiding in the cabling. While fiddling with those wires in the 3rd picture, I noticed a loose molex inside the case. I don't know if it fell down or what, but with that plugged in fans and leds work. This one is black as opposed to the 2 opaque white ones - so if you don't have a black one plugged in, keep looking. Thermaltake told me there is a 4th molex as well, but I have not found that.
BIOS too old to POST
Now, the issue appears to be that the motherboard shipped before it was technically able to run the chips they advertised it for. Everyone online is saying that I need to swap out the CPU with an older one long enough to upgrade the BIOS. Personally, I don't have another AM3 cpu and am kinda annoyed at the idea that I would have to buy a CPU that I would toss 5 minutes later. I emailed ASUS support - but I bet I am just delaying the inevitable.
I did find
this post that mentions the BIOS being physically replaceable with this
$15 part. Looking at my board, I have confirmed that the BIOS is swappable - though it means draining the water cooling and removing the second video card (not something I look forward to trying right away).
I was going to wait until I had the board completely up and dual booting to post this -- but I have no idea how long it will take to get the BIOS replacement. I'll go ahead and push this out now, and once I have the BIOS replacement I'll update the blog. I definitely do not look forward to pulling out that 2nd GTX to swap the BIOS - but it's better than buying a throw-away CPU.
UPDATE:
I have the system up and running... a brief recap of what I had to do...
- Replace the physical BIOS with the one listed above. This was a little harder than it should have been because I had to remove BOTH video cards to get to the BIOS since I have such a short watercooling tube between them. Also, my chip puller appears to be too big and I didn't have the patience to go to a store the following day, so I had to use my fingers instead.
- After #1, the board wouldn't boot. Not even fans now. The BIOS came with instructions stating that you may need to reset the CMOS. Ok.
- Tried the jumper first. No go.
- Pulled both video cards again so that I could get to the battery. Reset the battery and the jumper at the same time. Let me tell you, if you are installing the new BIOS -- get it before putting the board together because removing both of these cards is not fun.
- Woot! Boots into BIOS. Looked over the settings. I thought it seemed to be running a little hot (already at 89*F) but, I have never used water cooling before, so not sure what to expect.
- Install Windows [yes, I know - but I need it for some of my games]. Install some driver CDs for the motherboard, network card, etc. Installed the EVGA drivers and upon reboot... wait, no, it wouldn't reboot. damn. CPU LED, DRAM LEEEEEDDDDDDDDDDDDDDDD... hmmm
- MemOK button.
- CPU LED, DRAM LED, VIDEO LED, repeat, repeat repeat repeat... damn
- I contacted Asus who not only called me but gave me their email addresses so that I could get back in touch with them. Very professional.
- Tried jumper again. No good.
- Tried just 1 stick of memory. No good.
- Tried removing SLI bridge (it was the evga drivers installed last, right?). No good.
- Ok, let's try removing the video cards... as I went to pull them out, I noticed the network card is not sitting all the way down. I try to reseat it and notice it *won't* sit all the way down? WTF? Well, it came with another plate... checking - no that one is shorter... damn... pliers... bend faceplate... Ah, not it seats properly. Checking - hey! It boots.
- Put everything together and test booting throughout. Everything is fine now.
- Ok, with Windows installed, now let's install LMDE (Linux Mint Debian Edition).
- Booting, live boot failure?... and black screen. Damn.
- Some internet search and chats later (thanks Jon for finding it) I add 'nomodeset' to the grub boot command. It boots.
- Install LMDE (with grub on the Windows drive). Reboot. Black screen. Damn.
- Saw this post and decided to make it permanent..
sudo su - root
nano /etc/default/grub
And to make the change work even for recovery mode...
GRUB_CMDLINE_LINUX="nomodeset"
And then to update it and reboot:
update-grub
reboot
And we're good to go. I have Windows 7 and LMDE dual booting now. Now it's time to re-install my entire development environment ;)